
What common mistakes should I avoid when drawing anime eyes?
Drawing anime eyes is one of the essential skills for any aspiring anime artist. Understanding the basics and nuances involved in creating captivating anime eyes can greatly enhance your overall character design. This article aims to provide a comprehensive guide on how to draw simple anime eyes, focusing on step-by-step instructions, materials needed, and various techniques to create expressive eye styles.
Understanding the Anatomy of Anime Eyes
Key Features of Anime Eyes
Anime eyes can vary widely in style, but there are specific features that are commonly represented. A thorough understanding of these elements will aid significantly in mastering how to draw simple anime eyes. Below are the fundamental aspects to consider:
- Used Book in Good Condition
- George Trombley (Author)
- English (Publication Language)
- 376 Pages - 08/22/2014 (Publication Date) - Learn From Zero (Publisher)
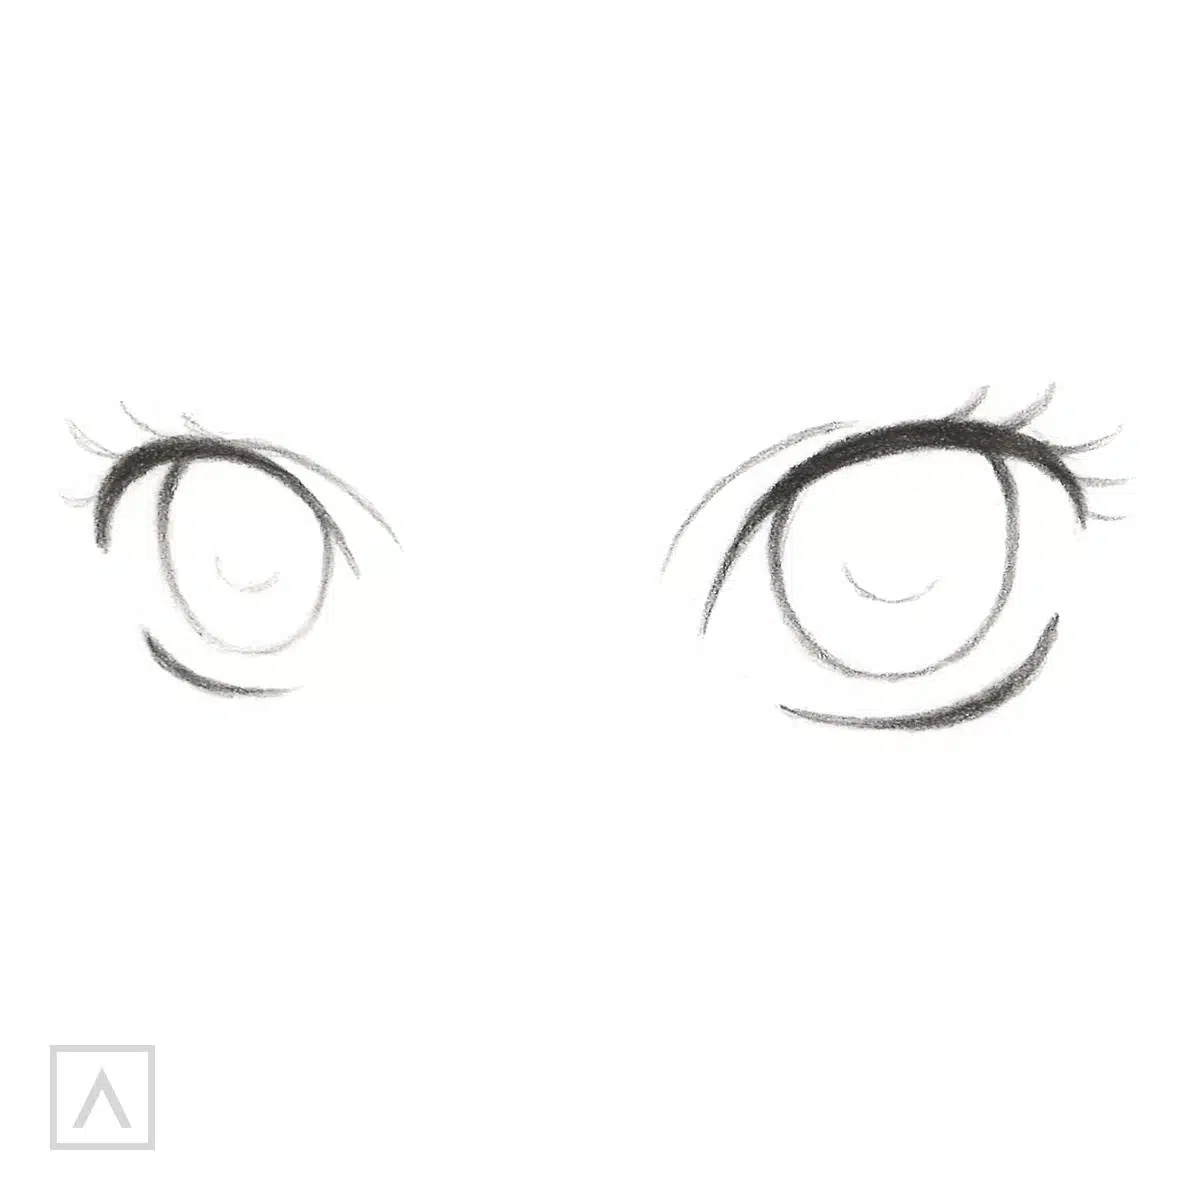
- Shape: Anime eyes typically feature a larger, more exaggerated shape compared to realistic eyes. The shapes can range from round and soft to sharp and cat-like, depending on the character’s personality.

- Iris and Pupil Size: The iris is usually large and vibrant, which gives anime eyes their distinctive and expressive appeal. The pupil can be either small, for dramatic effect, or enlarged, to convey innocence or wonder.
- Eyelids and Eyelashes: The eyelids can be drawn in various styles, but they often include prominent upper lids and subtly defined lower lids. Eyelashes can also vary, from less detailed markings for simpler designs to intricate layers for a more glamorous look.
- Light Reflection: Adding highlights or reflections in the eyes can give them depth and life. This is often represented by white or light-colored spots that contrast with the darker sections of the iris and pupil.
Simplified Eye Structures
It’s useful to break down the eye into its simplest anatomical parts when learning how to draw simple anime eyes. The basic structure consists of:
- Outline: Define the basic shape of the eye.
- Used Book in Good Condition
- George Trombley (Author)
- English (Publication Language)
- 376 Pages - 08/22/2014 (Publication Date) - Learn From Zero (Publisher)
- Iris: Add a large circle inside the outline.
- Pupil: Place a smaller circle in the center of the iris.
- Highlights: Draw small ovals or circles to represent light reflections.
- Eyelids: Incorporate simple lines above and below to complete the eye.
Understanding these basic components will enhance your confidence as you progress in your anime drawing skills.
Materials Needed for Drawing Anime Eyes
To successfully learn how to draw simple anime eyes, certain materials can enhance your drawing experience. Here’s a list of essential tools:
Drawing Tools
- Pencils: High-quality graphite pencils (preferably HB or 2B) are great for initial sketches.
- Eraser: A soft, kneaded eraser is perfect for correcting mistakes without damaging the paper.
- Fine-liner Pens: Use these for inking your drawings to achieve clear, crisp lines.
- Colored Pencils or Markers: Choose vibrant colors to fill in and shade your eyes.
- Paper: Opt for smooth drawing paper or sketchbooks suited for pencils and markers.
Optional Tools
- Digital Drawing Tablet: For those who prefer digital art, a drawing tablet and software can be beneficial.
- Lightbox: A lightbox can be useful for tracing and refining your artwork.
By gathering these materials, you’re well-prepared to start learning how to draw simple anime eyes more effectively.
Step-by-Step Guide on How to Draw Simple Anime Eyes
Below is a detailed step-by-step guide on how to draw simple anime eyes. Following these instructions will ensure an understanding of the process and provide valuable practice opportunities.
Step 1: Sketch the Basic Outline
Start by lightly sketching the basic eye shape. Use the following steps:
- Draw the Upper Outline: Create a curved line to form the top eyelid.
- Draw the Lower Outline: Follow by sketching a curved line for the bottom eyelid, ensuring it slightly connects with the upper line.
- Shape the Corners: Refine the corners of the eye for the desired shape – it can be sharp, round, or cat-like depending on your character.
Step 2: Add the Iris and Pupil
Next, focus on the inner details:
- Draw the Iris: Within the eye outline, sketch a large circle or oval for the iris.
- Add the Pupil: In the center of the iris, draw a smaller circle – this is the pupil.
Step 3: Detailing Eyelids and Eyelashes
Now, let’s give the eyes some character.
- Eyelids: Define the eyelids with a subtle curve along the shapes you established.
- Eyelashes: Draw a few thin lines extending outward from the upper lid to create eyelashes. You can adjust the thickness and length based on the character’s personality.
Step 4: Incorporate Highlights
Adding highlights can bring your anime eyes to life.
- Determine Light Source: Decide where your light is coming from.
- Add Highlights: Place small circular or oval shapes on the iris to represent light reflections. Make these areas white or a lighter shade compared to the iris.
Step 5: Shading and Coloring
To finish your drawing, apply colors and shading:
- Choose Eye Colors: Select colors that suit your character’s portrayals. Use bright colors to fill in the iris.
- Shade the Iris: Add darker and lighter areas within the iris for depth.
- Shading the Eyelids: A light grey or soft color along the upper lid can suggest shadows.
Step 6: Clean Up and Finalize
After completing the drawing, clean up the sketch:
- Erase unnecessary pencil lines, leaving only the defined outlines, and ensure that your eye drawing is neat and complete.
Different Styles of Anime Eyes
Exploring various styles of anime eyes can broaden your skills and help define your unique artistic edge. Here are three popular styles, along with their defining characteristics:
Style 1: Classic Anime Eyes
- Characteristics: Large, round, and expressive. Often used in shoujo manga and character designs aimed at eliciting cuteness.
- Techniques: Focus on big highlights and vibrant colors.
Style 2: Realistic Anime Eyes
- Characteristics: More proportionate to a real eye, blending elements of realism and anime. This style often applies more detailed shading.
- Techniques: Experiment with smooth gradients and multiple shades.
Style 3: Chibi Eyes
- Characteristics: Very exaggerated with minimal detail, enhancing the cuteness factor drastically.
- Techniques: Keep the iris size very large relative to the pupil and minimize other details.
Understanding these styles will enrich your repertoire when considering how to draw simple anime eyes.
Common Mistakes to Avoid When Drawing Anime Eyes
Even seasoned artists occasionally make mistakes that can detract from their work. Here are some common pitfalls to watch for when practicing how to draw simple anime eyes:
Proportionality Issues
Ensuring that the eyes are sized correctly relative to the character’s head is essential. Too large or too small can create an unnatural look.
Lack of Expression
Anime eyes are often meant to convey emotion. Avoid making them look too generic; focus on shapes and details that match the character’s mood.
Missing Highlights
Omitting highlights can make eyes appear flat. Always remember to add them to bring your eyes to life.
Uniformity in Style
Practicing different styles is essential; avoid getting locked into one design. Diversify your techniques and styles to keep your art fresh and interesting.
Additional Resources for Learning Anime Eyes
For those eager to enhance their anime eye drawing skills, several resources can be beneficial:
- Books: Check out “How to Draw Anime” by Komi-JU for additional techniques and inspiration.
- Online Tutorials: Websites like DeviantArt and platforms like YouTube host numerous anime drawing tutorials.
Conclusion
mastering how to draw simple anime eyes is both an enjoyable and rewarding experience. By thoroughly understanding the anatomy, employing the right materials, following a systematic process, and detracting from common mistakes, artists can enhance their skills and produce captivating eye designs. Whether you aim for a classic anime style, realistic representation, or whimsical chibi designs, the principles discussed will guide you toward achieving expressive and beautiful anime eyes. So grab your pencils, and start practicing to see how quickly your skills can improve!

