
Are there any tutorials for drawing Naruto online?
Drawing Naruto, one of Japan’s most beloved anime characters, can be an exciting and fulfilling experience. For fans wondering how to draw Naruto anime, mastering the art of replicating his distinctive features and expressive poses is essential. This comprehensive guide is designed to provide aspiring artists with all the tools they need to bring Naruto to life on paper, covering everything from basic shapes to advanced techniques.
Understanding Naruto’s Characteristics
Naruto Uzumaki is a character known for his spiky blonde hair, large blue eyes, and orange jumpsuit. To effectively learn how to draw Naruto anime, it’s important to break down his characteristics into manageable parts.
Key Features of Naruto
- Used Book in Good Condition
- George Trombley (Author)
- English (Publication Language)
- 376 Pages - 08/22/2014 (Publication Date) - Learn From Zero (Publisher)
- Ken Fukuyama, Yuki Fukuyama (Author)
- English (Publication Language)
- 246 Pages - 10/11/2022 (Publication Date) - Independently published (Publisher)
- Used Book in Good Condition
- Sumiko Uo (Author)
- English (Publication Language)
- 6 Pages - 01/01/2005 (Publication Date) - BarCharts Publishing Inc. (Publisher)
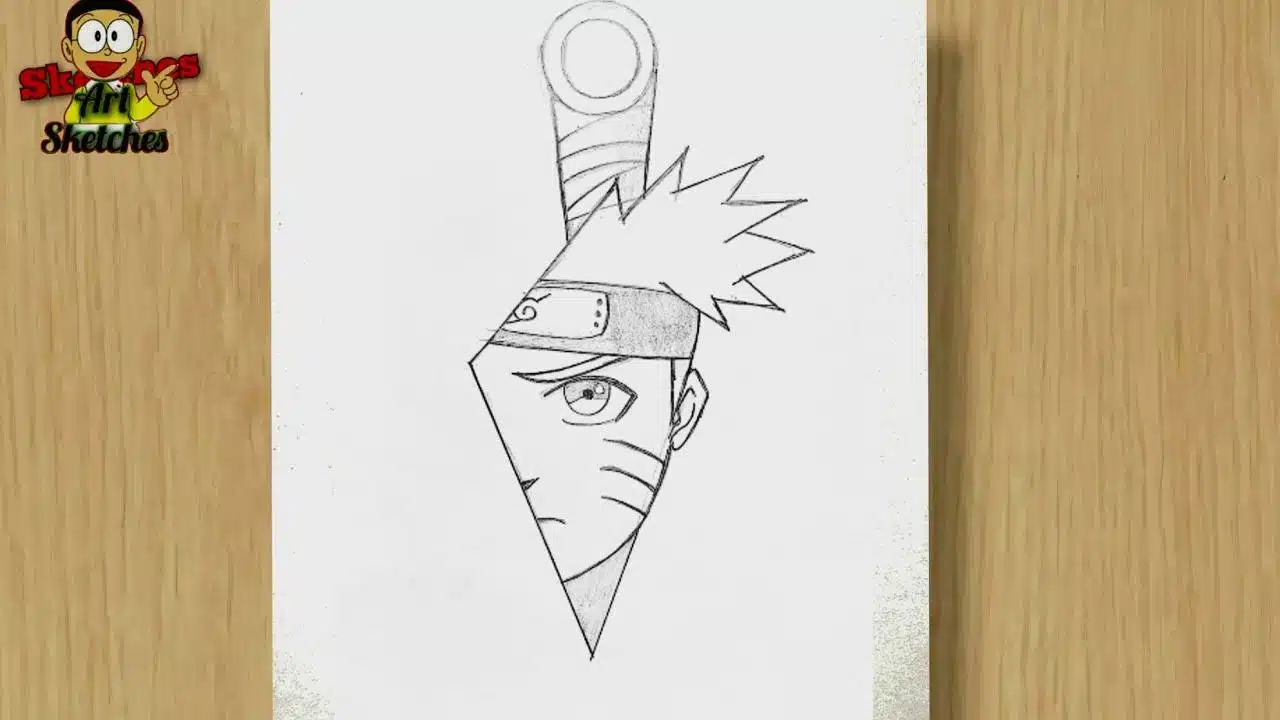
- Spiky Hair: Naruto’s hair is one of his most identifiable traits. It consists of five large spikes at the top, tapering down into smaller strands.
- Facial Features: Large eyes give Naruto an expressive and youthful look. His whisker-like markings on his cheeks are essential to his character design.
- Outfit: Naruto typically wears an orange jumpsuit with a high collar, which is crucial to capturing his look accurately.
- Accessories: Don’t forget his headband with a metal plate, which symbolizes his ninja status.


Materials Required for Drawing
Gathering the right materials is a critical first step in preparing to learn how to draw Naruto anime. Here’s a basic list of supplies needed:
- Pencils: Use various lead grades (2H for light lines and 4B for darker shading).
- Used Book in Good Condition
- George Trombley (Author)
- English (Publication Language)
- 376 Pages - 08/22/2014 (Publication Date) - Learn From Zero (Publisher)
- Ken Fukuyama, Yuki Fukuyama (Author)
- English (Publication Language)
- 246 Pages - 10/11/2022 (Publication Date) - Independently published (Publisher)
- Used Book in Good Condition
- Sumiko Uo (Author)
- English (Publication Language)
- 6 Pages - 01/01/2005 (Publication Date) - BarCharts Publishing Inc. (Publisher)
- Erasers: A kneaded eraser is versatile for various techniques.
- Drawing Paper: Smooth, high-quality paper will yield the best results.
- Inking Pens: Fine-tipped pens for outlining can help define the final image.
- Colored Pencils or Markers: For adding color, having a range of tones, especially the iconic orange, is vital.
Step-by-Step Guide on How to Draw Naruto Anime
To effectively learn how to draw Naruto, it’s best to follow a structured approach. Below is a step-by-step guide that artists can follow.
Step 1: Basic Shapes
Start with simple shapes to outline Naruto’s body and head.
- Draw a Circle: This will be the guideline for Naruto’s head.
- Add Guidelines: Sketch two lines intersecting at the center; one vertical and one horizontal. This helps position facial features later.
- Add a Jawline: From the bottom of the circle, draw the jawline to create an angular face.
Step 2: Facial Features
Now it’s time to add details to his face.
- Eyes: Draw two large ovals for his eyes, making sure they sit along the horizontal line.
- Nose and Mouth: Position a small nose between the eyes and sketch a simple line for a smiling mouth.
- Whisker Marks: Add the distinctive three whisker marks on each cheek.
Step 3: Hair Design
When drawing Naruto’s hair, remember to emphasize its spiky characteristic.
- Outline Spikes: Sketch the shape of the spikes starting at the crown of the head.
- Texture: Use short, quick strokes to mimic the texture of hair.
- Detailing: Define each spike’s edges and add depth with varying shades.
Step 4: Clothing and Accessories
Now focus on Naruto’s outfit and accessories.
- Outline the Jumpsuit: Draw the collar, sleeves, and the overall contour of Naruto’s jumpsuit.
- Headband: Sketch the headband around the forehead, adding detail to the metal plate in the center.
- Pocket Detailing: Don’t forget to add the pockets and other accessories like the kunai pouch.
Step 5: Inking and Coloring
Once you are satisfied with the pencil sketch, it’s time to go in with ink.
- Inking: Carefully go over the pencil lines with an inking pen. Use varied line thickness to add depth.
- Coloring: Select the right shades of orange for the jumpsuit, and use yellow for the hair. Ensure to blend shades carefully to achieve a vibrant look.
- Shading: Add shadows to give depth to the hair and outfit. Use darker shades where shadows naturally fall.
Additional Tips for Drawing Naruto
In addition to the above steps, here are some extra tips to enhance your skills in how to draw Naruto anime.
Practice Regularly
Drawing is a skill that improves with practice. Schedule dedicated drawing sessions to continuously refine your techniques.
Use References
Look for reference images of Naruto from various angles. These are invaluable in understanding how different poses and expressions work.
Study Other Characters
Familiarize yourself with other characters in the Naruto universe. This broadens your understanding of the art style and character relationships.
Attend Workshops or Classes
If you’re serious about your art, consider taking workshops focused on anime drawing. Many art studios offer classes specifically for anime and manga art.
Troubleshooting Common Mistakes
Even the most skilled artists make mistakes. Here are common mistakes when learning how to draw Naruto anime and how to correct them.
Proportions Off
If Naruto’s proportions look incorrect, step back and review your basic shapes. Adjust and refine as necessary.
Difficulty with Expressions
Expressions can be tricky. Use reference images or practice drawing different emotions by focusing on the eyes and mouth, as these are key to evoking emotion.
Coloring Challenges
If the colors appear flat, ensure to layer them and blend appropriately. Experiment with different coloring techniques to find what works best for you.
Conclusion
Learning how to draw Naruto anime can be both an enjoyable and rewarding experience. By breaking down each part of the process and practicing regularly, you can master the techniques needed to create captivating drawings of this iconic character. Using this guide as a foundation, continue exploring your creativity and dynamic styles, and share your Naruto-inspired art with fellow fans!
For more inspiration and resources, check out Naruto Wiki for in-depth character information and explore DeviantArt for artwork from other artists. Happy drawing!

